You have 0 items in your cart
The Best Cinnabon Cinnamon Rolls
This post may contain affiliate links. View my privacy policy and disclosure policy for more details.
These Cinnamon Rolls are the ultimate Cinnabon clone. Chewy, soft, and completely homemade. Throw out your old recipes because you’ll never need another Cinnabon Cinnamon Roll recipe again! These rolls are soft, buttery, and topped with a luscious Cinnamon Roll Icing that will have everyone literally drooling. Can you believe I wrote this recipe way back in 2013 and it’s still one of my most popular recipes?
Ingredient Notes + Variations
This recipe uses pantry staples plus a few secret weapons to get that soft texture and gooey center. Here’s what makes these cinnamon rolls special:
- Active Dry Yeast – Gives the dough a good rise. I like using Red Star Platinum yeast for consistent results.
- Buttermilk – Adds flavor and tenderness. Room temperature is best.
- Canola or Vegetable Oil – Keeps the dough soft and easy to work with.
- Brown Sugar – Creates that gooey filling we all love.
- Cornstarch – Helps thicken the filling so it doesn’t all leak out.
- Cream Cheese – The key to that rich, tangy frosting.
- Vanilla Extract & Lemon Juice – Brighten the frosting and balance the sweetness.
A Note About Enriched Dough
This Cinnamon Roll Recipe uses a highly enriched dough. What is enriched dough? Basically a bread dough that is made with more than just the basic water, yeast, salt and flour. The additions of butter, buttermilk, sugar and eggs make this an enriched dough. Why is that important to know? Enriched doughs inhibit yeast growth which means this dough will take longer to rise than a typical bread dough. It will grow! It will just take longer. I recommend either using rapid rise yeast or doubling your active dry yeast to get things going.

How to Make Cinnamon Rolls
The biggest thing you need to remember when making homemade Cinnamon Rolls is to have patience. Nothing about this recipe is hard per se, but there are a lot of steps. Keep with it! You can absolutely follow this recipe and end up with a pan of Cinnamon Rolls just as beautiful as mine! For full recipe details, including ingredients and measurements needed, see the printable recipe card down below.
Step 1. Proof the Yeast
In the bowl of a stand mixer fitted with a dough hook, pour in water, yeast and 1 tablespoon of the granulated sugar. Stir and proof 5 minutes.


Step 2. Make the Dough
Once the mixture looks bubbly and frothy, pour in remaining sugar. Stir on low for 15-20 seconds. In a small bowl, measure buttermilk, oil, and egg. Whisk ingredients together until egg is incorporated to other two ingredients. Pour contents into the water and yeast mixture. Stir another 20 seconds in the mixer.


Pour 2 cups of flour and salt into mixer and stir on low until incorporated. Sprinkle flour in by 1/4 cup increments until dough cleans the sides and bottom of the bowl.


Pro Tip: You may not use the entire amount of flour to get to this stage. THAT’S OK! When the dough is tacky but not sticky enough to stick to your hands when touched, it’s perfect. Once it has reached this stage, knead for 5 minutes.
Step 3. First Rise
Remove dough from bowl, grease and replace back into same mixing bowl {since it’s practically clean anyways.} Cover with plastic wrap and a dish towel. Rise 1-2 hours or until the dough has doubled in size. It is a very enriched dough, so it might take longer for it to rise. That is fine and normal!


Step 4. Make the Filling
In a medium-size bowl, stir brown sugar, cinnamon, and cornstarch together until combined. Set aside.


Step 5. Roll out Dough
Punch down dough. Flour a large clean table liberally with flour. Lightly flour dough as well. Roll dough out to be a 20×30 large rectangle {or as close to that as possible} while moving dough around to ensure it’s not sticking to your work surface. If it’s a little short or uneven, feel free to cut off the edges to even it all out.


Step 6. Fill + Roll
Spread softened butter over dough, being sure to go right to the edges leaving a 1-inch strip untouched on one of the longer sides of dough. Dump brown sugar mixture onto the middle of the dough and spread with your hands, creating an even layer over top of the butter, still leaving that 1-inch strip of dough untouched. If you have any filling that falls off the sides of the dough, use a bench scraper to replace. Lightly press the sugar mixture into the butter using a rolling pin.


Roll the dough up into a tight log, finishing with the plain dough on the bottom to seal the entire thing together. Cut off the uneven ends to even out the log.


Score log every 2 inches and then slice your rolls using those marks. Place onto parchment paper lined, butter greased pans. 12 fit into a 9×13, 3 remaining fit into a loaf pan, or 8×8 with the small ends. Cover pans with plastic wrap and dish towels.


Step 7. Second Rise
Let rolls rise another 1-2 hours or until they are touching and have risen almost double. If you are not using quick rise yeast, have added too much flour or are working in a chilly kitchen, it may take 3-4 hours for your rolls to rise. My rolls always spread out more than up, so just be aware that they will most likely spread out more than up.


Step 8. Bake
Bake in a preheated oven at 350° F for 17-20 minutes, or until tops start to turn golden brown. Watch them carefully!!


Step 9. Make Cream Cheese Icing
While the rolls are baking, whip cream cheese and butter together. Stir in vanilla, corn syrup and lemon juice. Scrape sides and mix again. Pour in powdered sugar and stir slowly until it starts to incorporate. Then mix on high for 5 minutes or until frosting starts to lighten in color. Scrape sides and mix again briefly.


Pro tip: If you want your frosting to look more like Cinnabon, whip it 5-7 minutes or until it lightens in color.
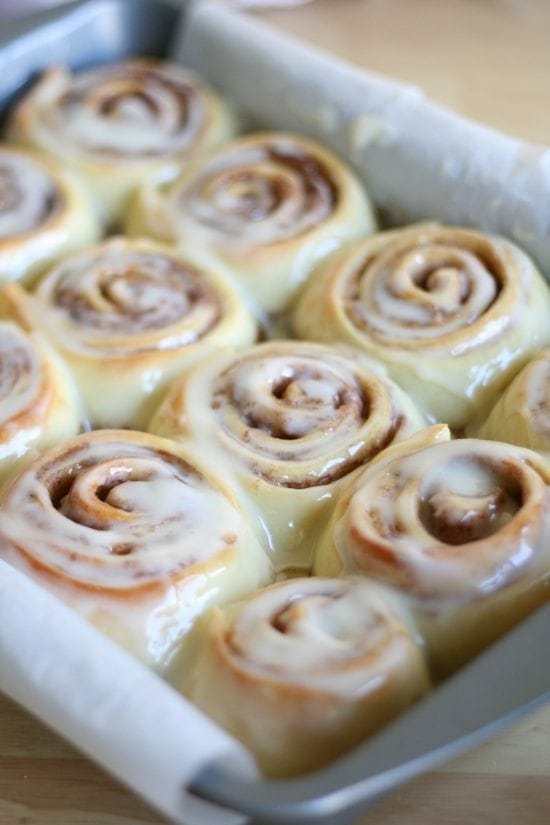
Step 10. Frost Cinnamon Rolls
Once rolls have been removed from the oven, frost using half the amount made. Then after they have cooled a few more minutes, frost again with remaining frosting. The first frosting will melt down into the rolls and the second layer should stay put. Serve warm.


Recipe Tips for Success
- Use room-temperature buttermilk and egg for a smoother dough.
- If your kitchen is cold, place the bowl in your oven with just the light on to speed up rising.
- Don’t add too much flour… slightly tacky dough bakes softer.
- Roll tightly so the filling stays inside.

What to Serve with Cinnamon Rolls
- Breakfast Casserole – A hearty make-ahead option for a bigger brunch spread.
- Fruit Salad – Light and refreshing with the richness of the rolls.
- Homemade Hot Chocolate – Cozy drink to pair with warm rolls.
- Bacon in the Oven – Because salty + sweet is always a win.
- Chili – Have you heard about this midwest classic pairing?
These homemade cinnamon rolls are soft, gooey, and exactly what you need for the ultimate breakfast treat. Once you make them, you’ll never go back to store-bought. The printable recipe card is below. Have a great day! 🙂

The Best Cinnabon Cinnamon Rolls Recipe
These Cinnamon Rolls are the ultimate Cinnabon clone. Chewy, soft, and homemade, you'll never need another Cinnamon Roll Recipe again!
Ingredients
for the dough-
- 3/4 cup warm water
- 2 1/4 teaspoons active dry yeast use rapid rise (*see notes below)
- 1/2 cup granulated sugar
- 1 teaspoon salt
- 1/4 cup buttermilk at room temperature
- 1 egg
- 1/3 cup canola oil or vegetable oil
- 4 1/2-5 cups all purpose unbleached flour
for the filling-
- 1/2 cup butter softened (or margarine)
- 1 1/4 cups packed light brown sugar
- 2 1/2 tablespoons ground cinnamon
- 2 tablespoons cornstarch
for the frosting-
- 2 oz. cream cheese at room temperature
- 1/4 cup butter softened (or margarine)
- 1 teaspoon vanilla extract
- 1/2 tablespoon corn syrup
- 1 teaspoon fresh lemon juice
- 1 1/4 cups powdered sugar
Instructions
Make the Dough-
- In the bowl of a stand mixer fitted with a dough hook, pour in water, yeast and 1 tablespoon of the granulated sugar. Stir and proof 5 minutes.
- Once the mixture looks bubbly and frothy, pour in remaining sugar. Stir on low for 15-20 seconds. In a small bowl, measure buttermilk, oil, and egg. Whisk ingredients together until egg is incorporated to other two ingredients. Pour contents into the water and yeast mixture. Stir another 20 seconds in the mixer.
- Pour 2 cups of flour and salt into mixer and stir on low until incorporated. Sprinkle flour in by 1/4 cup increments until dough cleans the sides and bottom of the bowl. **You may not use the entire amount of flour to get to this stage. THAT'S OK! When the dough is tacky but not sticky enough to stick to your hands when touched, it's perfect. Once it has reached this stage, knead for 5 minutes.
- Remove dough from bowl, grease and replace back into same mixing bowl {since it’s practically clean anyways.} Cover with plastic wrap and a dish towel. Rise 1-2 hours or until the dough has doubled in size.
Filling and Cutting Rolls-
- In a medium-size bowl, stir brown sugar, cinnamon, and cornstarch together until combined. Set aside.
- Punch down dough. Flour a large clean table liberally with flour. Lightly flour dough as well. Roll dough out to be a 20×30 rectangle {or as close to that as possible} while moving dough around to ensure it’s not sticking to your work surface. If it’s a little short or uneven, feel free to cut off the edges to even it all out.
- Spread softened butter over dough, being sure to go right to the edges leaving a 1-inch strip untouched on one of the longer sides of dough. Dump brown sugar mixture onto the middle of the dough and spread with your hands, creating an even layer over top of the butter, still leaving that 1-inch strip of dough untouched. If you have any filling that falls off the sides of the dough, use a bench scraper to replace. Lightly press the sugar mixture into the butter using a rolling pin.
- Roll the dough up into a tight log, finishing with the plain dough on the bottom to seal the entire thing together. Cut off the uneven ends to even out the log. Score log every 2 inches and then slice your rolls using those marks. Place onto parchment paper lined, butter greased pans. 12 into a 9×13, 3 remaining into a loaf pan, or 8×8 with the small ends. Cover pans with plastic wrap and dish towels.
- Let rolls rise another 1-2 hours or until they are touching and have risen almost double. If you are not using quick rise yeast, have added too much flour or are working in a chilly kitchen, it may take 3-4 hours for your rolls to rise. My rolls always spread out more than up, so just be aware that they will most likely spread out more than up. Bake in a preheated 350 degree for 17-20 minutes, or until tops start to brown. Watch them carefully!!
Cinnamon Roll Icing-
- While the rolls are baking, whip cream cheese and butter together. Stir in vanilla, corn syrup and lemon juice. Scrape sides and mix again. Pour in powdered sugar and stir slowly until it starts to incorporate. Then mix on high for 5 minutes or until frosting starts to lighten in color. Scrape sides and mix again briefly.
- Once rolls have been removed from the oven, frost using half the amount made. Then after they have cooled a few more minutes, frost again with remaining frosting. The first frosting will melt down into the rolls and the second layer should stay put. Serve warm.
Video
Notes
*I use Red Star Platinum Yeast (rapid rise kind). Feel free to double the yeast in this recipe to ensure a good rise, especially if you’re working in a drafty kitchen.
-See step by step photos for more details.
-If your frosting isn’t quite ready after you pull the rolls out of the oven, cover with foil so the tops don’t dry out and get crispy.
Storage + Make Ahead Instructions
- To Store: Cover leftovers tightly and keep at room temperature up to 2 days or in the refrigerator up to 4 days.
- To Freeze: Freeze unbaked rolls after the second rise (before baking) or freeze baked rolls without frosting. Thaw overnight, bake or reheat, and frost as directed.
- To Make Ahead: Prepare through the second rise, cover well, and refrigerate overnight. Bake fresh in the morning.
Nutrition
Calories: 432kcalCarbohydrates: 67gProtein: 5gFat: 16gSaturated Fat: 3gCholesterol: 15mgSodium: 290mgPotassium: 105mgFiber: 2gSugar: 35gVitamin A: 485IUVitamin C: 0.2mgCalcium: 48mgIron: 2.1mg
Rate This RecipePlease consider Leaving a 5-Star Review!
Variations
- Use whole wheat flour for a heartier roll
- Swap heavy cream for buttermilk if that’s what you have
- Add a handful of chopped nuts, berries, or mini chocolate chips to the filling
- Try orange zest in the frosting for a bright twist
- Use melted butter in the filling instead of softened… either works
Cinnamon Roll FAQ
Can I substitute Margarine for Butter?
Yes, you absolutely can easily substitute butter for margarine in this cinnamon roll recipe. Cinnabon lists margarine on their ingredients list, so that is why I use it from time to time, but most households probably would prefer real butter.
Why do you use Cornstarch in the filling?
I know cornstarch is a totally random ingredient, but it helps hold the filling in the cinnamon roll instead of oozing out while baking. It still oozes, but not nearly as much. (Cinnabon actually uses a chemical/food gum to help it not ooze which is REALLY appetizing I know.)
Do I have to use Corn Syrup in the frosting?
Nope, you don’t have to use it! It does add a nice shine (and is found on that darn Cinnabon list of ingredients as well) so I like to use it, but it won’t ruin your cinnamon rolls if you simply omit it.
My Cinnamon Rolls didn’t rise! What did I do wrong?
Cinnamon Rolls NOT rising (or rising really slowly) could be caused by a number of reasons. Your yeast was not fast-acting, your yeast was old, you kneaded in too much flour, your kitchen was on the colder side, etc. etc. If you’re really concerned about it, simply double the yeast to have some extra insurance. These rolls are made with a very enriched dough (see my note above about enriched doughs) which make it a slow rise. This is totally normal! Again, if you’d like to speed things up, simply double the yeast.
Can I over knead my dough?
Kneading dough in a stand mixer is an efficient way to make any kind of bread dough, however, it can get *too* efficient and there is a tendency to add in too much flour. It should still stick to the bottom of the bowl, but pull away from the sides. Also, when you feel it, it should be tacky but not enough to stick to your hands and leave a residue. Kneading the cinnamon roll dough by hand is a great way to ensure the dough doesn’t get over kneaded.
My rolls are still raw in the middle after baking! What did I do wrong?
Typically, cinnamon rolls stay raw in the middle for two reasons: (1) they were rolled too tightly and never had a chance to rise in the middle OR (2) they need more time in the oven to bake. How do we fix this? Roll your cinnamon rolls to be tight enough to maintain their shape, but not so terribly tight that the dough can’t rise. Practice does make perfect! Also, be sure to make your rolls in the bottom third of the oven.
More Recipes to Try
- Apple Fritters – Crisp edges, soft centers, and full of apple flavor.
- Monkey Bread – Gooey pull-apart bread everyone loves.
- Banana Nut Muffins – Quick and simple for weekday mornings.
- French Toast Casserole – A great overnight option for brunch.
- Orange Rolls – a citrus twist on this recipe, perfect for winter mornings.
If you make this recipe, I would really appreciate it if you would give it a star rating and leave your review in the comments! If you have a picture of your finished dish, post it on Instagram using the hashtag #laurenslatest and tagging me @laurens_latest.


Hi Katie! Just wanted to thank you for this recipe….ive been making your recipe for at least 10 years & they always turn out perfection!!! I always get rave reviews from people…not one complaint ever…only complaint is that most can’t eat only one!!!
This recipe is absolutely brilliant – and your directions for making it could not be more precise. As someone who is a very comfortable baker – but never found the right recipe for cinnamon rolls – hats off to you! Absolutely amazing and appreciate you sharing!
I have been wanting to try my hand at cinnamon rolls before christmas. I have never made them from scratch, mine turn out great. Thank you for such a great recipe.
😍